Cygwin History
Cygwin was developed by Cygnus Solutions in 1995. It is written in C/C++ for the Windows operating system. It is licensed under the GNU LGPLv3 license, which essentially means Open Source. Cygnus was acquired by Red Hat in 2016 and continues to develop the application.
Functionality
Cygwin provides a library which implements the POSIX system, and a GNU development toolchain to compile linux sourcecode applications so they will run under Cygwin. It also permits installation of services such as sshd, apache and other inetd applications so Windows appear to be a linux server to clients connecting to it.
Download
Cygwin is available for download from the official website at https://www.cygwin.com, and is available in a 32bit and 64bit version.
Installing Cygwin
The screenshots below will go through a 32 bit install of Cygwin.
Cygwin Setup
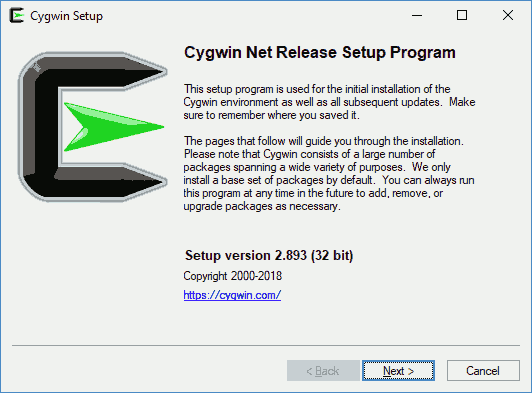
Run the Cygwin setup program. The Setup program will launch with some important information. It will state:
This setup program is used for the initial installation of the Cygwin environment as well as all subsequent updates. Make sure to remember where you saved it.
The pages that follow will guide you through the installation. Please note that Cygwin consists of a large number of packages spanning a wide variety of purposes. We only install a base set of packages by default. You can always run this program at any time in the future to add, remove, or upgrade packages as necessary.
Click on the "Next" button.
Cygwin Setup - Choose Installation Type
The install will then ask "Choose a Download Source"
Choose whether to install or download from the internet, or install from files in a local directory. Choose the "Install from Internet" Radio button (should be chosen by default) and click "Next"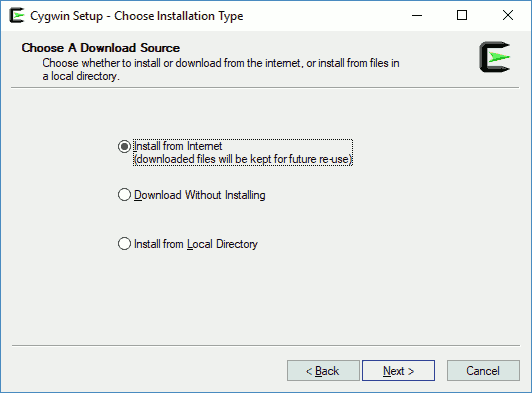
Cygwin Setup - Choose Installation Directory
The install now prompts "Select Root Install Directory."
Select the directory where you want to install Cygwin. Also Choose a few installation parameters. The default Root Directory is "C:\Cygwin". You also have the choice to install for "All Users" or "Just Me". You can keep the default of "All Users (RECOMMENDED)" and click on "Next".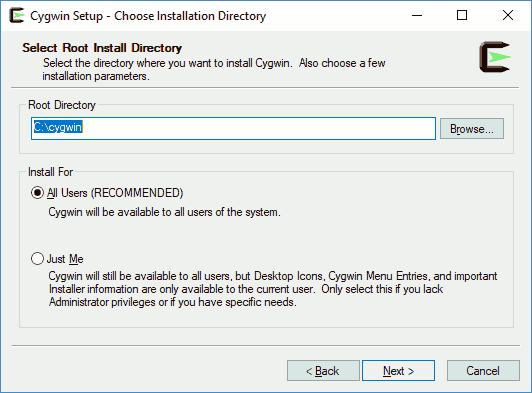
Cygwin Setup - Select Local Package Directory
Select a directory where you want Setup to store the installation files it downloads. The directory will be created if it does not already exist.
It will default to the location where you ran the setup program. If this location is ok, click on "Next"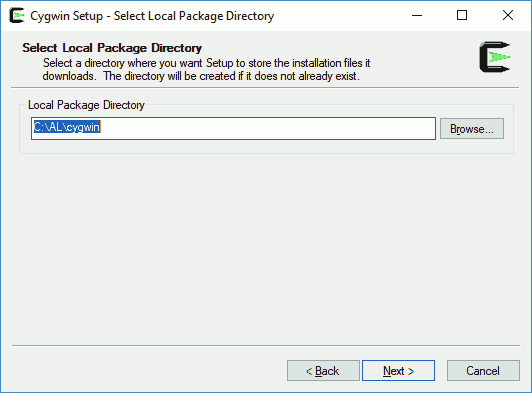
Cygwin Setup - Select Connection Type
Select Your Internet Connection. Setup needs to know how you want it to connect to the internet. Choose the appropriate settings below. If you are not sure, choose Direct Connection, then click "Next".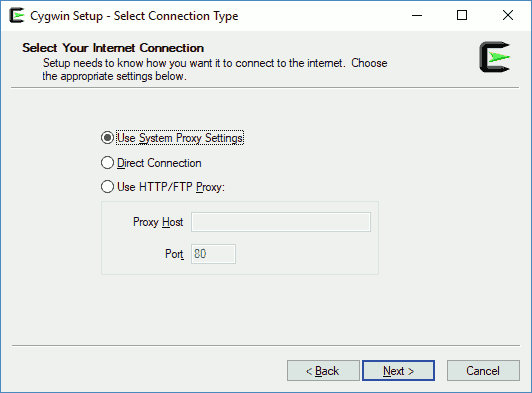
Cygwin Setup - Choose Download Site(s)
Choose a Download Site.
Choose a site from this list, or add your own sites to the list.
Normally you want to choose a site close to your location. Hilite one or more sites, then click on "Next"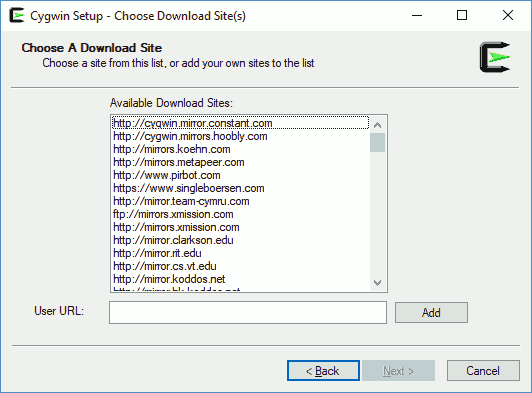
Cygwin Setup - Select Packages
Select Packages.
Select packages to install. Here is where you can choose the various packages to install. For a basic install, just keep everything as default, and click on "Next".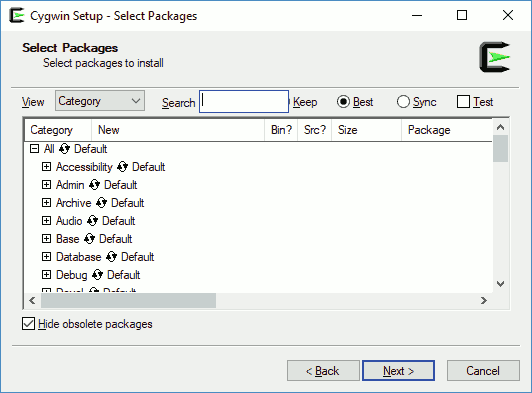
Cygwin Setup - Review and confirm changes
Review and confirm changes.
On this screen, it will show all the various packages which were chosen in the previous step. Click on the "Next" button.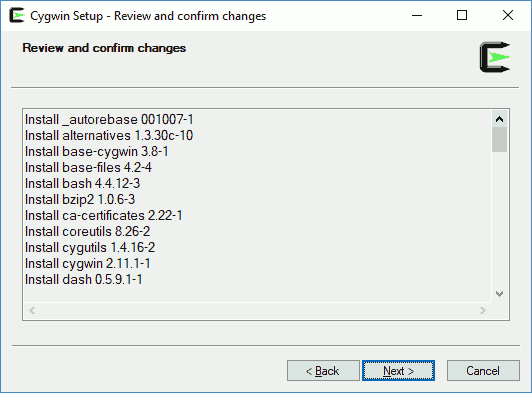
Cygwin Setup - Percentage complete.
The setup program will begin downloading the packages you selected from the download sites you selected. It will place them into the install directory you have chosen previously. It will display status bars for the progress of a particular package, total progress of all packages, and disk space remaining.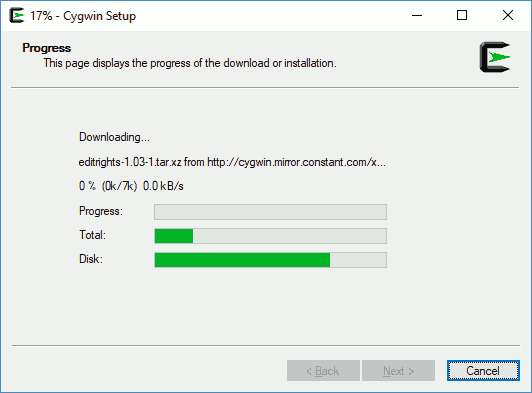
Cygwin Setup - Installation Status and Create Icons
Create Icons
Tell setup if you want it to create a few icons for convenient access to the Cygwin environment. Keep the default selections of creating Icon on Desktop and Add Icon to Start Menu. Click on the "Finish" button.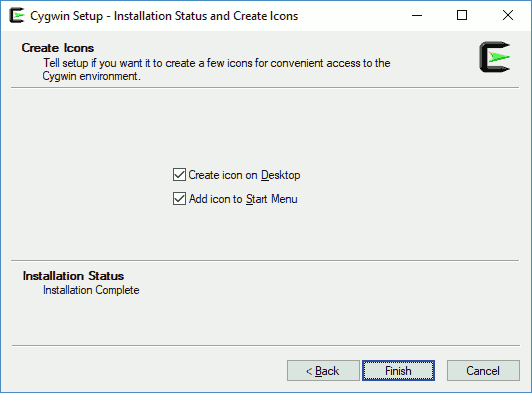
Cygwin Command Prompt Launches
The command prompt or shell launches for Cygwin. Since this is the first time Cygwin is launching for you, it will state:
Copying skeleton files.
These files are for the users to personalise their cygwin experience.
They will never be overwritten nor automatically updated.
'./.bashrc' -> '/home/user//.bashrc'
'./.bash_profile' -> '/home/user//.bash_profile'
'./.inputrc' -> '/home/usr//.inputrc'
'./.profile' -> '/home/user//.profile'
It will then state your username@yoursystemname followed by the $ prompt.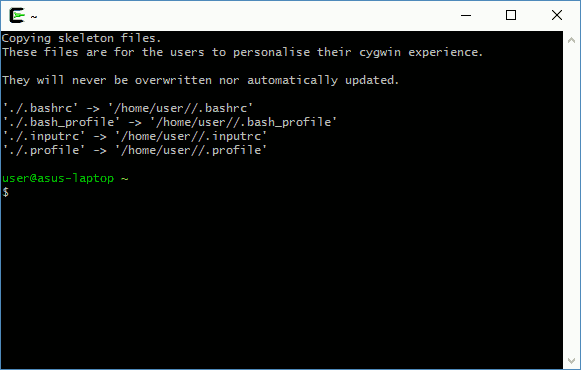
- And you are done!
Summary
The basic Cygwin installation will setup the foundation of linux for windows. The meat and potatoes come from the installation of specific packages to meet the needs of the developer / user.